Appearance
Configure Account
Use the Configuration page to review and update the information stored for the selected entity. This includes company details, contact information, payment URLs, support details, branding settings, and related entities.
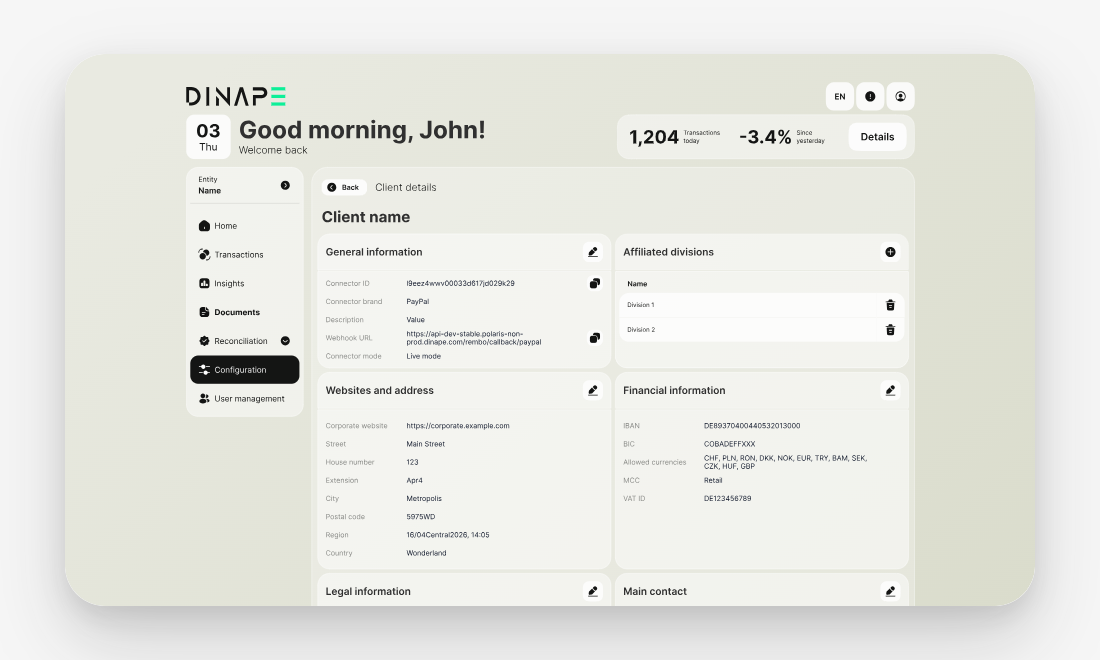
The page opens for the entity currently selected in Dinape. Depending on your access rights and the selected entity, you can view or edit the available configuration sections.
Understand account levels
Dinape uses account levels to organize payment configuration across your organization. The available levels depend on your setup and access rights.
A typical structure can include:
- Client: the highest account level
- Division: an organizational unit below a client
- Merchant: the entity that processes payments
- Channel: a sales or operational context within a merchant
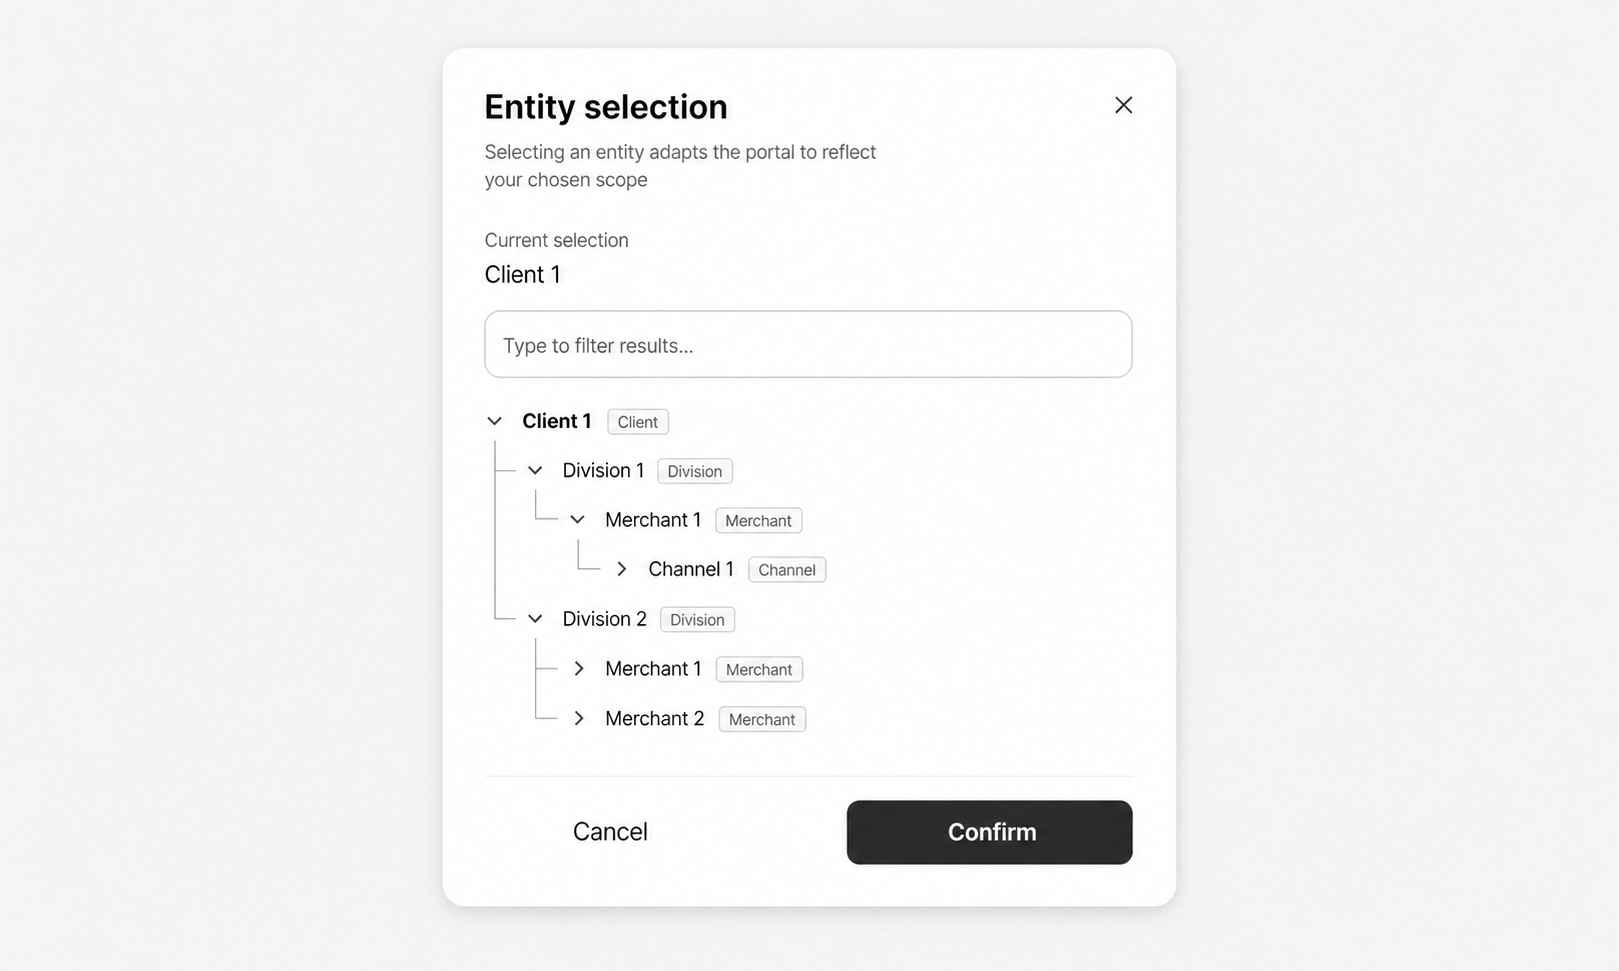
Channels help separate payment configurations for different use cases, such as online shop payments, in-app payments, or different business areas.
The entity you select determines which configuration details, reports, and payment data you see in Dinape.
Review entity details
The top of the page shows the selected entity and its details.
Use General information to review the entity name and related identifiers, such as Client ID, Name, and Trading as.
Use Website and address to add or update company website and address details, including Corporate website, Street, House number, City, Postal code, Region, and Country.
Add financial and legal information
Use Financial information to maintain payment-related company details, including IBAN, BIC, Allowed currencies, MCC, and VAT ID.
Use Legal information to add legal registration details, including Legal form, Registry court, and Registry number.
Add contact information
Use Main contact to define the primary contact person for the entity.
Use Financial contact to define the contact person for finance-related topics.
Each contact section can include details such as Salutation, First name, Last name, Position, Email, and Phone.
Configure payment URLs
Use Payment URLs to define the URLs used during and after payment flows. Payment URLs act as fallback URLs for payment flows. They can define where customers are redirected after successful, failed, or canceled payments, and where Dinape sends payment notifications.
You can configure:
- Main URL
- Return success URL
- Return failure URL
- Return cancel URL
- Callback URL
- FAQ URL
- Terms conditions URL
- Privacy policy URL
- Imprint URL
These URLs help direct users back to the correct pages and provide required information during the payment experience.
Add a support contact
Use Support contact to add the email address that users should see when they need help.
INFO
The support contact email is shown in system-generated emails to users. Leave it empty if it does not apply.
Configure branding
Use Branding to define the key visual elements shown in the Dinape platform.
You can add:
- Logo URL
- Favicon URL
- Primary color
For more information about branding options, see White Label overview.
Manage affiliated entities
Use the affiliated entities section to view the entities connected to the selected account level.
For example, on a client, you can view affiliated divisions. If you have the required access rights, you can add or remove related entities from this section.
Check meta information
Use Meta information to see when the entity was created and last updated.